
 Business License

Ice Maker Installation Space and Ventilation: A Practical Site-Planning Guide
When a Las Vegas hotel installed a high-output ice maker in a compact service closet behind the breakfast buffet, the project manager congratulated himself on saving floor space. Within six months the machine was producing 25% less ice than its catalog rating, the compressor was cycling longer, and the maintenance team was scheduling its second service call. The closet had no exhaust vent, the side clearance was only 5 cm instead of the recommended 15 cm, and the ambient temperature inside routinely hit 38 °C. The problem was not the machine. It was the space.
This scenario is common in commercial kitchens, hotels, bars, and processing facilities where floor space is limited and heat sources are nearby. If you are planning an installation, understanding ice maker installation space and ventilation is as important as choosing the right capacity. A well-ventilated, correctly sized location protects output, energy use, and service life. A poorly planned location can quietly undercut the investment before the first bin fills.
This guide explains how to measure space, set clearances, manage airflow, handle remote condensers, and confirm site-specific requirements with the supplier before delivery.
Already know your model and site dimensions? Contact the sales team to confirm installation requirements before ordering.
Why space and ventilation affect performance
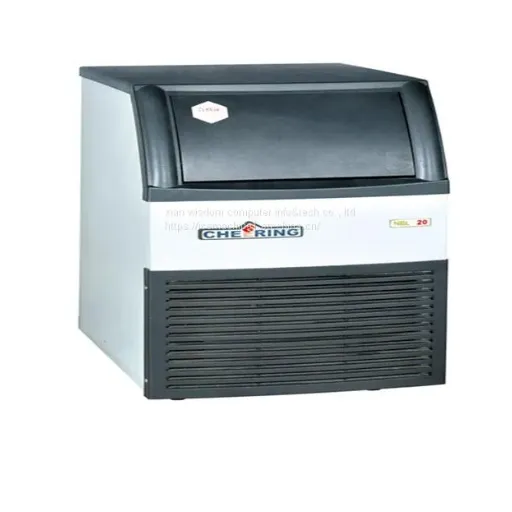
An ice maker is a heat mover. It removes heat from water to make ice and then rejects that heat into the surrounding air through the condenser. The warmer the air around the unit, the harder the refrigeration system must work. When airflow is restricted, the air recirculates and gets hotter. Output falls, energy use rises, and components run under stress.
Most manufacturers rate capacity at controlled conditions, commonly 21 °C ambient air and 10 °C incoming water. In a real site, ambient temperature can be much higher, especially when the unit is squeezed into a closet, placed above a grill, or installed in a room with poor airflow. Catalog capacity assumes ideal ventilation. Real output depends on the space you provide.
XiAn Wisdom Computer Info&tech Co., Ltd lists ice makers, flake ice machines, dry ice machines, and ice cream machines among its product categories. Before selecting a model, confirm the installation conditions that apply to the unit you are considering and how those conditions change with space and ventilation.
Heat rejection basics
Self-contained ice makers reject heat through the condenser at the rear or sides of the cabinet. Air enters through one set of grilles, passes over the condenser coils, and exits warmer. If the hot exhaust air cannot escape, it is drawn back into the intake. This recirculation raises the operating temperature continuously during production cycles.
Modular units with remote condensers move heat outside through refrigerant lines. The indoor head still produces some heat from the compressor and electrical components, but the bulk of the heat is rejected remotely. Remote systems need careful line sizing and outdoor airflow too, but they are often the better choice in hot kitchens or crowded equipment rooms.
Measure the installation space early
Site measurements should be part of the buying decision, not an afterthought. Record every dimension and condition that could affect fit or airflow before you request a model recommendation.
Cabinet dimensions and clearances
Start with the physical footprint. Note the width, depth, and height of the unit including the bin. Add the manufacturer's required clearances for airflow, service access, and door swing. Common requirements include:
Rear clearance: 10 to 20 cm for air intake or exhaust.
Side clearance: 10 to 20 cm, sometimes more for modular heads.
Top clearance: 30 to 60 cm for service access and warm-air escape.
Front clearance: enough for bin access, cleaning, and filter changes.
These numbers vary by model, so use them as planning assumptions only. Confirm the exact clearances for the selected model from the installation manual.
Doorways, corridors, and delivery paths
A machine that fits the installation space still has to reach it. Measure every doorway, corridor, elevator, and turn along the delivery path. Pay attention to handrails, floor transitions, and ceiling fixtures that reduce effective width. Some modular heads and large bins must be moved separately and assembled on site.
When a restaurant group in Chicago replaced its ice maker in early 2024, the new modular head arrived in one piece. It was the right width for the equipment room but 8 cm too tall for the basement stairwell. The crew had to rent a temporary outdoor lift and pass the unit through a ground-floor window. Measuring the path would have avoided the delay and extra cost.
Floor, drain, and utility locations
Confirm the floor can support the loaded weight of the machine and full bin. Note the location of the floor drain relative to the unit's drain outlet. Check whether the floor is level. A sloped floor can cause water to pool or prevent the drain from working correctly. Also confirm the positions of the electrical outlet and water shut-off valve.
Set clearances that protect airflow
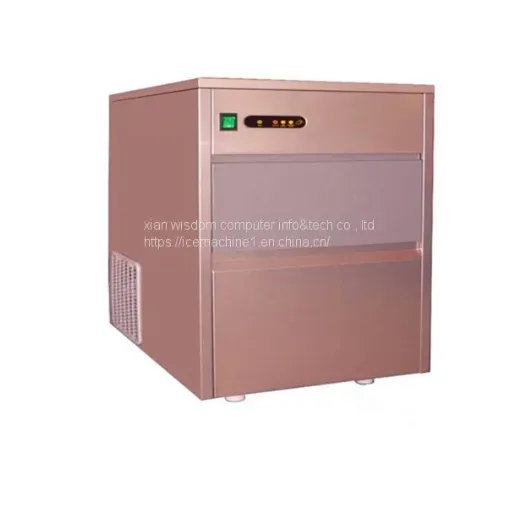
Clearance is not wasted space. It is the path air uses to enter, cool the condenser, and exit. Tight clearances reduce airflow and raise the operating temperature.
Minimum clearance versus recommended clearance
Manufacturers publish minimum clearances that allow the unit to function, but minimum is not the same as optimal. Where possible, use the recommended clearances. If space is tight, choose a smaller unit or a remote condenser rather than crowding a larger unit. A machine that is too large for its space will underperform regardless of its catalog rating.
Side-by-side and stacked installations
When two ice makers are installed side by side, the hot exhaust from one can be drawn into the intake of the other. Leave extra space between units or stagger them so exhaust plumes do not cross. Do not install an ice maker directly above a dishwasher, oven, steam table, or fryer unless the manufacturer's documentation specifically allows it. Rising heat and grease will coat condenser fins and reduce efficiency.
Enclosed spaces and closets
A closet or alcove can work if it is designed for ventilation. The space needs intake air at the bottom and exhaust air at the top, ideally ducted to an adjacent room or outside. A small closet with a louvered door is usually not enough. If the closet shares a wall with a hot kitchen, heat transfer through the wall can raise the ambient temperature above the rating.
If you must install in an enclosed space, request the manufacturer's high-temperature output rating. Some manufacturers publish capacity at 32 °C or even 38 °C. Use that number for sizing, not the standard 21 °C rating.
Manage ventilation in the installation room
Ventilation is about replacing warm air with cooler air. The goal is to keep the air entering the condenser close to the room's general temperature.
Mechanical ventilation options
In hot or crowded equipment rooms, passive airflow may not be enough. Options include:
Exhaust fans that remove hot air at the ceiling.
Supply fans that bring cooler replacement air in low.
Split-system air conditioning or spot cooling for the equipment room.
Ducted ventilation that moves condenser exhaust directly outside.
Any mechanical system should be sized for the heat load. Ice maker heat rejection is roughly equal to the electrical power input plus the cooling load, so a unit drawing 1,000 W can reject more than 3,000 W of heat when production, compressor, and fan loads are combined. A ventilation contractor can calculate the required airflow in cubic meters per hour based on the unit's heat rejection and the acceptable room temperature rise.
Air-conditioning considerations
Air conditioning can keep the room temperature low, but it must be sized for the heat load. A small wall unit may not keep up with a high-output ice maker plus other kitchen equipment. Also, cold air blowing directly on the ice maker can cause condensation or interfere with sensors. Aim for even room temperature rather than a cold spot directly in front of the unit.
Outdoor and remote condenser installations
Remote condensers are installed outside and connected to the ice maker head with refrigerant lines. They reject heat where it cannot warm the indoor space. This arrangement is common in large restaurants, hotels, and supermarkets.
Remote systems require:
Correct refrigerant line length and diameter.
Adequate outdoor airflow around the condenser.
Protection from debris, leaves, and dust.
Clearance for service access on all sides.
Compliance with local refrigerant and electrical codes.
Do not assume any remote condenser fits any head. The outdoor unit must be matched to the head and charged for the line length. Confirm these details with the supplier before installation.
Site conditions that interact with space and ventilation
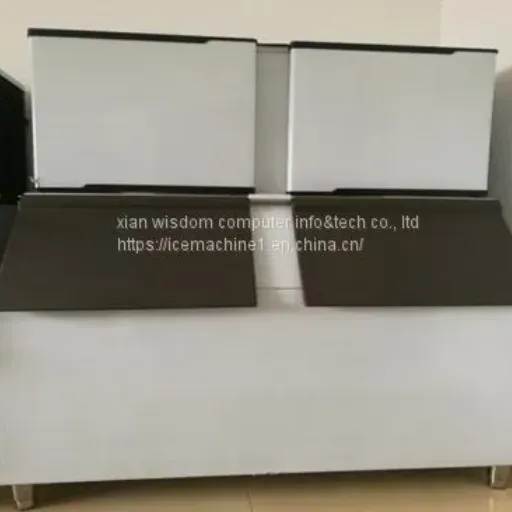
Space and ventilation do not work in isolation. Water supply, electrical layout, and room temperature all interact with the physical installation.
Water temperature and pressure
Warm incoming water increases the load on the refrigeration system. If the water heater is near the ice maker or the supply line runs through a hot ceiling, the incoming water temperature may be higher than expected. Check the water temperature at the planned inlet location during peak operating hours, not during an early-morning survey.
Pressure also matters. Low pressure can slow fill cycles and reduce production. High pressure can cause valves to leak or overfill. Install a pressure regulator if the building pressure exceeds the manufacturer's maximum.
Electrical heat and load centers
The ice maker's compressor, fans, and controls generate electrical heat. A crowded electrical panel or shared circuit with other high-load equipment can cause voltage drop or nuisance trips. Provide a dedicated circuit sized to the nameplate data. Keep the disconnect switch accessible but not in a position where it blocks airflow.
Grease, dust, and contaminants
In kitchens, airborne grease and flour can coat condenser fins and act as insulation. In dusty environments such as bakeries or processing plants, particles clog air intake grilles. Plan for more frequent cleaning when the installation environment is dirty. Some locations benefit from filter screens or quarterly maintenance contracts.
Prepare a site-readiness checklist
Use this checklist during site planning and before the installer arrives. Confirm each item against the current documentation for the selected model.
| Check | Why it matters | What to confirm |
|---|---|---|
| Floor load capacity | A full bin can weigh 100 kg or more. | Floor rating and bin weight when full. |
| Level floor | Uneven floors cause drainage problems. | Level within manufacturer's tolerance. |
| Clearances on all sides | Restricted airflow reduces output and life. | Rear, side, top, and front clearances. |
| Delivery path | The unit must reach the installation space. | Doorway, corridor, elevator, and turn dimensions. |
| Drain location and slope | Proper drainage prevents standing water. | Floor drain position, slope, and connection size. |
| Water supply pressure and temperature | Wrong conditions reduce ice production. | Inlet pressure range and water temperature at peak hours. |
| Electrical circuit and disconnect | Undersized circuits trip or cause voltage drop. | Voltage, phase, current, and dedicated circuit. |
| Ventilation or cooling | Heat rejection keeps the room temperature stable. | Room airflow, exhaust capacity, or air-conditioning load. |
| Remote condenser location | Outdoor units need clean air and service access. | Line length, height difference, and outdoor clearance. |
| Local codes and permits | Compliance avoids rework and inspection failures. | Plumbing, electrical, and refrigeration requirements. |
This checklist is a planning tool. The final requirements come from the model-specific installation manual and local codes.
Common installation mistakes to avoid
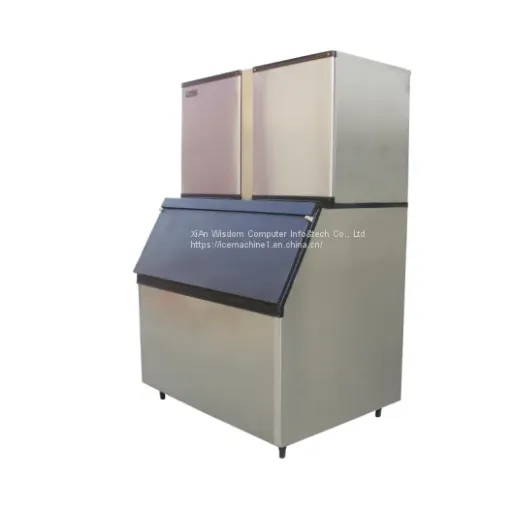
Even experienced contractors make these mistakes when space is tight or schedules are short.
Ignoring the rear clearance. Pushing the unit against a wall blocks exhaust air and traps heat.
Installing above heat sources. Ovens, grills, and dishwashers raise ambient temperature and introduce grease.
Using a closet without ventilation. A louvered door is not a substitute for airflow design.
Skipping the delivery path measurement. The unit must fit through doors and around corners before it fits in the room.
Undersizing ventilation. A small exhaust fan may not remove enough heat for a high-output machine.
Sharing a circuit with other loads. Voltage drop and nuisance trips are common when ice makers share circuits.
Forgetting maintenance access. Filters, coils, and drain lines need regular cleaning. Leave enough room to work.
When a university dining hall in Florida installed two large modular heads in 2023, the contractor left only the minimum side clearance and placed them 10 cm apart. Hot air from one unit fed the intake of the other. After the first summer, both machines were producing well below catalog capacity. The fix was to separate the units and add an exhaust fan at the ceiling. The original layout looked efficient on paper, but it fought the physics of heat rejection.
Confirm installation details with the supplier
General guidance can only take you so far. The final installation plan must be based on the documentation for the exact model and your specific site. Before ordering, request the following from the supplier.
Documentation to request
Installation manual. Includes dimensions, clearances, weights, utility connections, and ventilation requirements.
Capacity rating conditions. Confirm output at your expected ambient temperature and water temperature.
Electrical data sheet. Lists voltage, frequency, phase, full-load current, and circuit breaker size.
Plumbing diagram. Shows inlet size, pressure range, drain connection, and recommended water treatment.
Remote condenser details. If applicable, includes line sizing, maximum length, and charging specifications.
Warranty and service terms. Confirm what documentation and conditions are required to maintain coverage.
The company states that quality management and after-sales support are priorities, but you should still request written installation and service information for the specific model and order.
Conclusion
Planning ice maker installation space and ventilation means treating the location as part of the equipment specification. Start with the physical dimensions, add the clearances the manufacturer requires, and then design airflow that keeps the condenser inlet air within the rated range. Consider water temperature, electrical supply, delivery paths, and local codes at the same time.
Use the capacity guide to match output to your demand, then confirm that the installation space can support that output. When you are ready, request the installation manual for the exact model and walk through the checklist with your installer. A few hours of site planning can prevent years of reduced output, higher energy bills, and unnecessary service calls.
Prepare your site dimensions, ventilation plan, and utility details, then contact the sales team to confirm installation requirements and request model documentation.
Recently Posted
-
Centrifugal blower selection: how to choose the right model for your application
August 12, 2026Most centrifugal blower selection mistakes are not made inside the machine. They are made before the enquiry goes out, when a buye Read More
 -
How to Select a Pump for Your Application: A Buyer's Guide
August 12, 2026In March 2026, a maintenance supervisor at a beverage plant in Monterrey filed a one-line request: "Get us a new water pump.& Read More
 -
Industrial Pump Selection: A Practical Guide for Buyers
August 12, 2026A plant engineer at a beverage bottling facility in Rotterdam ordered three pumps in March 2025, choosing them by flow rate and pr Read More
 -
How to choose water treatment equipment: a buyer's selection guide
August 12, 2026What would a failed water-quality audit cost your operation? For a food processor, a beverage plant, or a commercial facility, the Read More

Contact Us
Recommended Products
-
 Large Capacity Ceiling Mounted Space Saving Indoor Pool DehumidifierNegotiableMOQ: 1 Piece
 -
Commercial Home Use Bathroom Dehumidification Swimming Pool Ceiling Mounted Mini DehumidifierNegotiableMOQ: 1 Piece
-
Greenhouse Grow Room Industrial Ceiling Mounted Duct Indoor Pool DehumidifierNegotiableMOQ: 1 Piece
-
Duokai OEM Indoor Dehumidifier Portable Swimming Pool Dehumidifier in Stock With CENegotiableMOQ: 1 Piece
-
High Quality Low Voltage ODM & OEM PLC Distribution CabinetNegotiableMOQ: 1 Set
-
Saladin Type Malt Production LineNegotiableMOQ: 1 Set
-
Seawater Desalination SystemUS$ 2000 - 1000000MOQ: 1 Set
-
High Speed Synthetic Lane Bowling Ball ReturnUS$ 50 - 2000MOQ: 10 Pieces
-
Reliable Automatic Six Axis Industrial Packing Robot With Self Diagnostic SystemNegotiableMOQ: 1 Piece
-
Multi-Travel Radius Six Axis Servo Robot for Custom Automation WorkstationNegotiableMOQ: 1 Piece
-
Labor Saving 6 Axis Industrial Robot Boost Workshop Production EfficiencyNegotiableMOQ: 1 Piece
-
Factory Direct Wholesale Carton Palletizer Packing Line Robot for MilkNegotiableMOQ: 1 Piece
-
Six-Axis Industrial Robotic Arm for Handling Welding Loading UnloadingNegotiableMOQ: 1 Piece
-
High-Automation High-Precision Six-Axis Metal Laser Industrial Welding RobotNegotiableMOQ: 1 Piece
-
Six-Axis Automatic Industrial Welding Robot Arm With Competitive PriceNegotiableMOQ: 1 Piece